Papercraft - Yuki Nagato
Feel free to join in the discussion on this article.
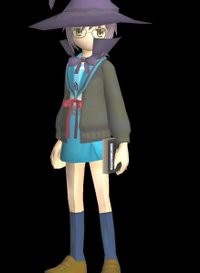
I've started many papercrafts... few I have ever finished. I decided to do Yuki Nagato from The Imperishable Night website. Yuki is the 3 year old alien construct from the show The Melancholy of Haruhi Suzumiya. The model includes the witch's costume with book though it would have been as cool with her with the guitar.
Sadly, both the file and the website no longer exist. No doubt you can find it somewhere online.
The file had two versions. I choosed the 'perfect face' edition. I needed to download the latest version of Pepakura Viewer to view the pdo file. There was no instructions so I needed to have my computer running to view the model to be able to assemble the papercraft. To save paper as well as ink, I decided to only print one page at a time. With 14 pages, this is a large papercraft, standing nearly 11 inches when complete.
I might opt to not print the witch's cape and hat. This model was started on long weekend, May 19, 2008. So far it's the middle of June.
Assembling the Face
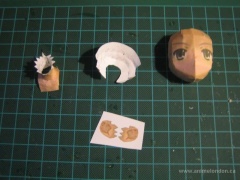
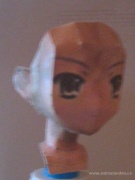
I started with the face. The Pepakura Viewer allows to only show only objects you need to concentrate on so I turned off everything but the face. I printed first two pages. It must be noted that the paper size is set to A4. Since I have letter paper, I answered 'yes to adjust the image.
I decided early on; not to worry too much about getting the model perfect. The papercraft would just be setting on a shelf away from people at Neo Tokyo anime store. Though I tried to do my best with the papercraft. The paper I am using is Hammermill paper white which is made extra white due to it is clay-based pigment. It holds printing colour better than regular bleach paper used in regular copiers.
Assembling the Feet and Legs
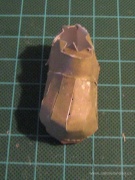
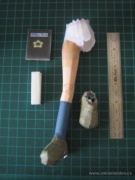
The shoes proved to be difficult. The firt one I assembled was the right working from the heel to the toe. The left which assembled better, from the toe to the heel. Also on the page was the book and ST_1 which I had to pencil in the lines to cutout. It supposely acts as a brace inside the head.
As I assembled the right leg, I worried that I might have assemble it wrong so I printed off page 5 which had the panties so I could check orientation of the leg and feet. Knowing now, I should have started with the panties to begin with and work down, not up. I left the soles of the shoes off so I could possibly add weights to balance to model later one. No doubt I'll need a stand given it's size.
Adding the Sailor scarf
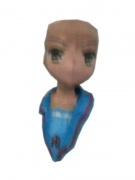
Also on page 5 which had the panties, there was part of clothes_2, the Sailor Scarf along with the bow and part of clothes_1. I decided to assemble it to avoid have loose peices of paper around which could be lost or damamged.
Adding the scarf to the face was a litle troublesome though I did manage to do it. The paper buckles at one spot... hopefully it can be ironed out when I get around to the jacket.
I need to finish the left leg and shoe. As it is, it already stands over 6 inches.
Michael Eh? 11 June 2008
Finished the legs and stuffed them with cotton batting to prevent them in being crushed and to add weight to the lower body. I'll have to find a bigger box so I can transport the figure.
Michael Eh? 12 June 2008